Cornflake Cake; A Quarantine Bake
Hi, friends!
I hope this post finds you well. If it feels odd for you to be hearing from me mid-week rather than on Sunday like usual – well, it’s odd for me too, but I’ve decided to switch things up a bit. Wednesday is the new Sunday, didn’t you hear?
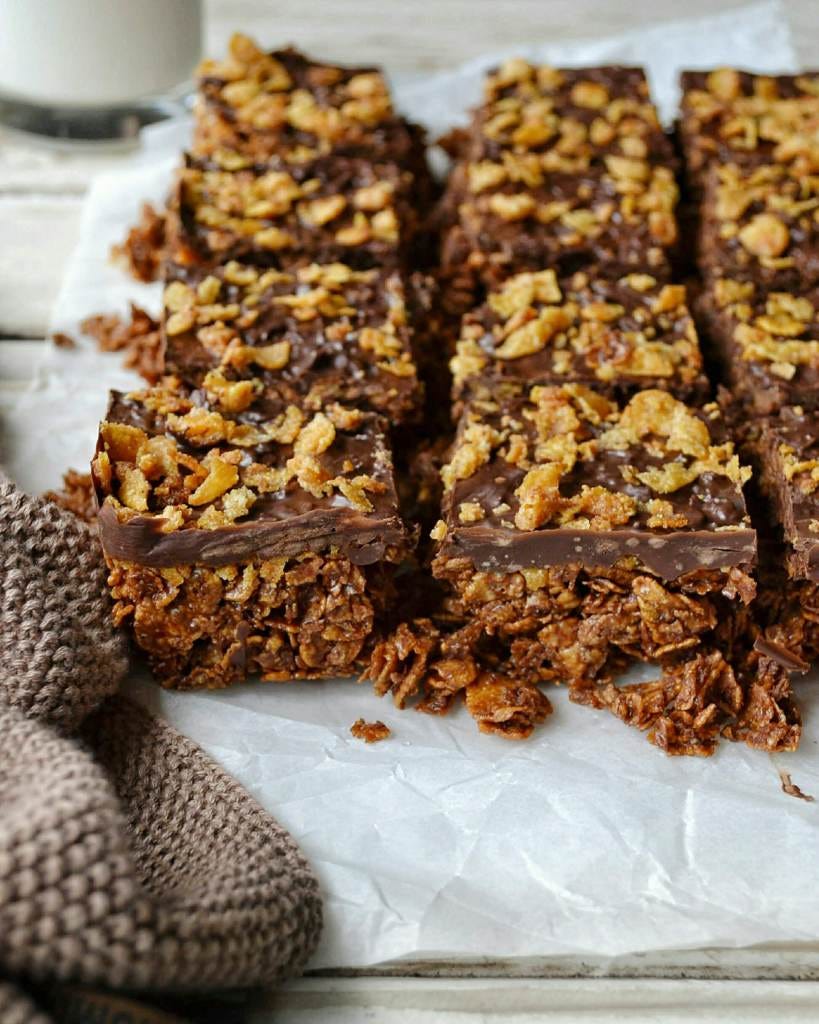
I just thought I’d drop by real quick to share a little secret with you: Boyfriend & I are addicted to Cornflake Cake. It’s kind of like a fancied up version of those cornflake cupcake things they serve at kids parties, but better. Another secret: you probably have 99% of the ingredients for this baby in your press right now. It consists mostly of melted chocolate, salted butter by the boatload, and cornflakes. You know, all the good things.
Boyfriend has been making a scaled back version of this recipe for years, but recently we decided to amp it up & give it a makeover. The recipe you see below is the culmination of our creative endeavors and honestly, the results are better than we could have hoped.
See, there are three distinct layers to this insane snacking situation, each as important as the next. This is what we’re dealing with:
a thickkkk layer of cornflakes mixed with butter, chocolate, and sweetener in the form of golden syrup
a generous dousing of cornflake crunch – à la Christina Tosi – that sticks to the sweet layer below and provides the all-important salty aspect
a heavy handed pour of melted semi-sweet chocolate to bind the layers together and give us a contrasting texture to the ones beneath
To summarize, what we have on our hands here is a salty, sweet, crunchy, chocolate covered snack. Have you ever heard of anything as wonderful before now? Welcome to the Cornflake Cake Club, my friends.
We like to keep our squares in a baggie in the freezer to keep them extra crunchy & less crumbly. They never freeze the whole way through, so they’re perfect every time!
Cornflake Cake; A Quarantine Bake
Addictive chocolate squares – salty, sweet, crunchy, perfection.
Yield: 16 squares
Author: Vicki
INGREDIENTS
for the cornflake crunch:
85 g cornflakes, lightly crushed
20 g milk powder
20 g caster suagr
1/2 tsp salt
65 g salted butter, melted
for the cornflake cake:
520 g cornflakes lightly crushed
195 g butter, melted
150 g dark chocolate, melted
90 g golden syrup
for the chocolate layer:
200 g semi-sweet chocolate, melted
DIRECTIONS
for the cornflake crunch:
Preheat the oven to 140C & line a baking sheet with parchment paper; set aside.
Combine all of the ingredients together in a medium bowl, ensuring everything is evenly coated. Spread the conflake mixture on the prepared baking sheet & bake for 20-minutes, until lightly golden and buttery. Set aside & leave to cool completely before use.
Once cooled, set aside 1/3 cup for the topping.
for the cornflake cake:
Line a 9×9-inch brownie tin with parchment paper, leaving the edges hanging over the sides; set aside. Place the lightly crushed cornflakes in a large bowl; set aside.
In a medium sized bowl, whisk together the butter, chocolate, and golden syrup. Pour over the cornflakes and stir together until everything is evenly coated.
Transfer the cornflake mixture to the prepared brownie tin & use an offset spatula to squish it firmly down and into the corners – we want it to be sturdy.
Evenly spread the cornflake crunch mixture over the top of the cornflake layer, lightly pressing down so it adheres to the chocolate.
Next, the chocolate layer. Pour the melted chocolate over the top of the cake & use an offset spatula to spread it evenly around, trying not to disturb the cornflake crunch layer beneath.
Sprinkle the reserved cornflake crunch across the top of the chocolate layer.
Place in the fridge for at least two hours before lifting out of the brownie tin & slicing into 16 squares. Transfer the squares to the freezer & eat from frozen.
Did you make this recipe? I’d love to know! Please leave a comment & a rating below, or tag me on Instagram @imvcki. Thank you so much for supporting Passionate Baker!
The post Cornflake Cake; A Quarantine Bake appeared first on Passionate Baker Travels.


