

Cherry Pie

A few weeks ago, Boyfriend’s parents treated us to a staycation in Kerry. The trip promised to be relaxing retreat, where we’d spend some QT with Boyfriend’s family. It was a no-brainer. We booked the time off work, packed for all weather types, planned our journey, and I compiled a list of what I’d bake. Eventually, I settled on: a pie, a tart, bars of some sort, and sausage rolls for good measure. I immediately knew it had to be a cherry pie, even though I’d never made a cherry pie before in my lifetime.
The cherry pie decision was so final that not even the ludicrous price of cherries could deter me. When I made this, we were knee-deep in those irritating few weeks of the season when cherries cost more than the rest of your shopping put together. Alas, I refused any alternatives; I didn’t want to make anything else. This opinion wasn’t understood by the cashier who told me the prices would be dropping the next week, and why didn’t I wait to buy them then? I kindly told him to butt out. However, thankfully for you, cherry season is finally in full swing. You won’t have to have any heart-to-heart moments with your cashier.
making this ahead of time?
Now, because I had also committed to baking several other things, I had to spread the pie baking process out over three days. I did a lot of small steps over the course of two days, and on the third day I finally baked it. Side note: the extra resting & chilling makes for an extra flakey crust! This has officially overtaken my Peach Pie in the race to have the Flakiest Pie Crust Ever. But seriously, how easy is that? A three day process that works around your schedule! Day 1: make the dough & leave in the fridge overnight. Day 2: fit dough into pie dish & leave in the fridge overnight. Also, pit the cherries, cover with cling film, and leave in the fridge overnight. Day 3: assemble the pie & bake until bubbling & brown in all the right places.
As for taste, it is a long summer evening in a pie. A super flaky crust – thanks to my three day assembly plan – and & filling bursting with deliciously juicy cherries. Not too sweet, but not too tart either.
Added bonus: Boyfriend’s family loved it.
Happy baking!
Cherry Pie
Flakey pie crust, filled with a juicy cherry filling.
Yield: 9 inch pie
Author: Passionate Baker
INGREDIENTS
for the dough
340 g plain flour
1 tsp salt
255 g unsalted butter, very cold & cut into small cubes
4-6 tbsp ice water
for the filling
900 g pitted cherries
5 tbsp cornflour
130 g granulated sugar
1/2 lemon, juiced
to finish
1 egg, beaten
demerara sugar, for sprinkling
DIRECTIONS
First, make the pie dough. Whisk together the flour & salt in a large bowl. Working quickly, add the butter to the flour & toss. Use your fingers to press each cube of butter into a flat sheet. Keep tossing the butter to make sure each piece is covered in flour. If at any time the butter seems warm, refrigerate the bowl briefly. Sprinkle about 4 tablespoons of ice water into the bowl & use a gentle hand to stir together until just combined. You’ve added enough water to the mixture if you can pick up a handful of the dough & easily squeeze it together without it falling apart, but without it being all sticky. Split the dough into two disks, each wrapped in cling film & leave to rest in the fridge for at least 2 hours before using. (Remember, we need to keep the dough extra chilled if we want it to be extra flaky.)
Once the dough has chilled, remove one of the disks from the fridge & on a lightly floured surface, roll it out into a roughly 12-inch circle that is about ¼-inch thick. Carefully press the dough into your pie dish/tart tin & store in the fridge while you prepared the filling. (Think of the flakes.) (FYI: I fit one of the disks into my pie dish & left it to chill in the fridge overnight, ensuring that it was stone cold. I rolled the second disk into a circle & left on a sheet pan for perhaps an hour before filling & assembling my pie.)
Remove the second disk from the fridge & roll out into a circle roughly 12-inches. Place on a sheet pan & leave to chill in the fridge.
Now, the filling. In a large bowl, gently stir together the cherries, granulated sugar, cornflour, almond extract & lemon juice.
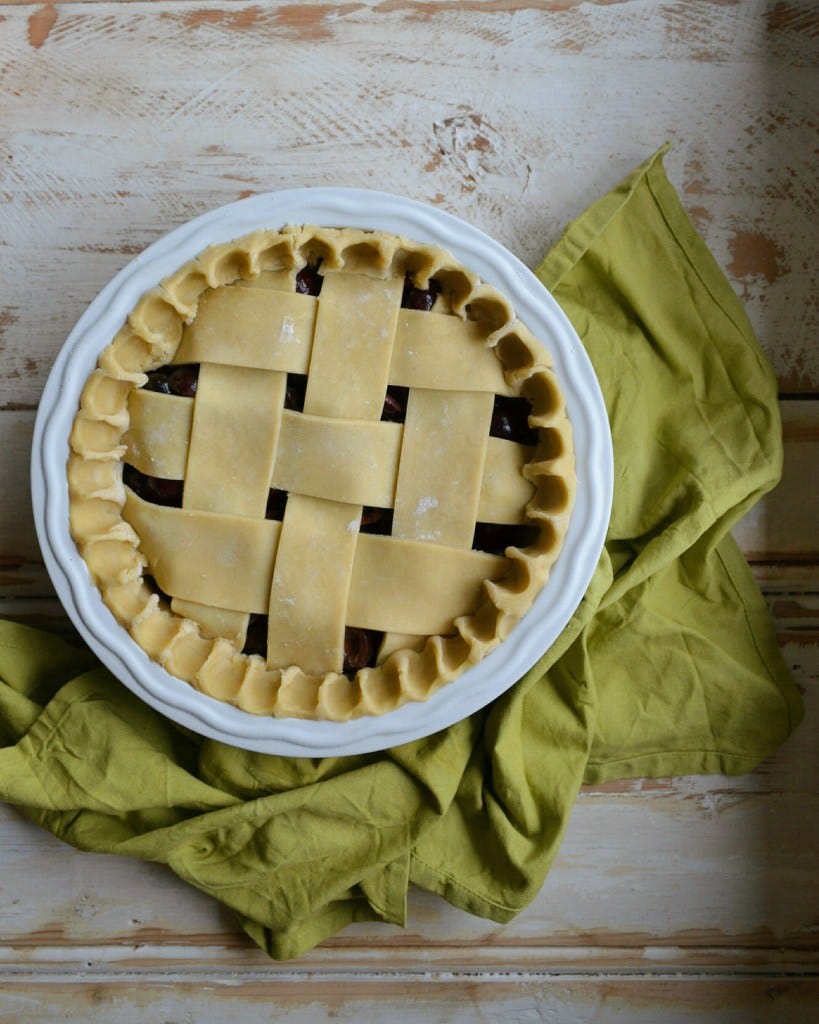
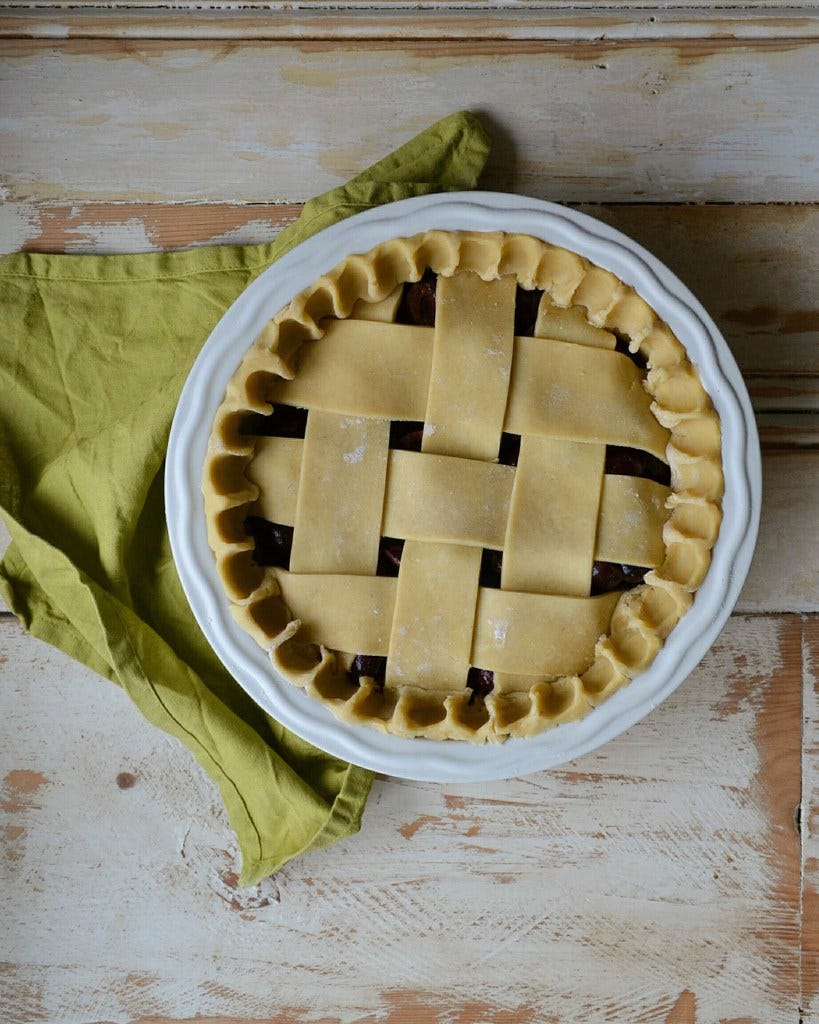
Fill the prepared pie shell with the filling & cover with the second prepared crust (or make into a lattice topping – I watched a tutorial on YouTube). Crimp the edges together, and leave to chill in the fridge until ready to bake (I left mine in the fridge pre-made and unbaked for 8 hours while I was at work).
Preheat the oven to 200C. While the oven heats up, slide the whole pie into the freezer for at least 15-minutes, & think of it as a necessary step to pie success.
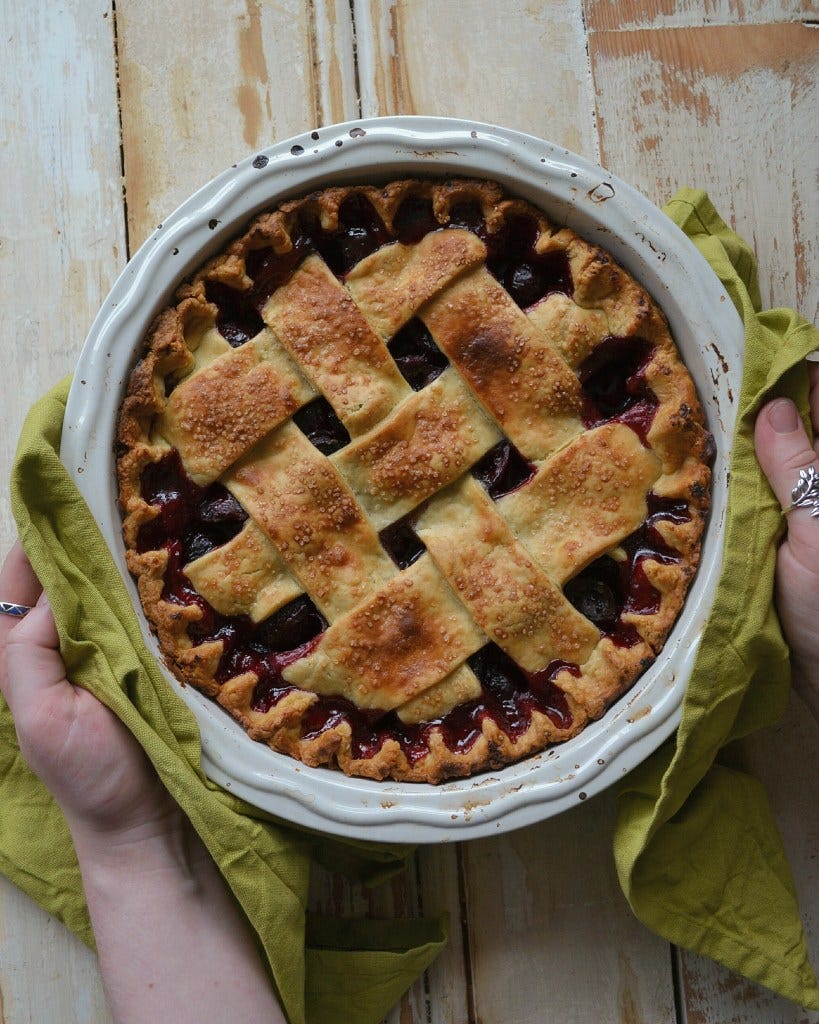
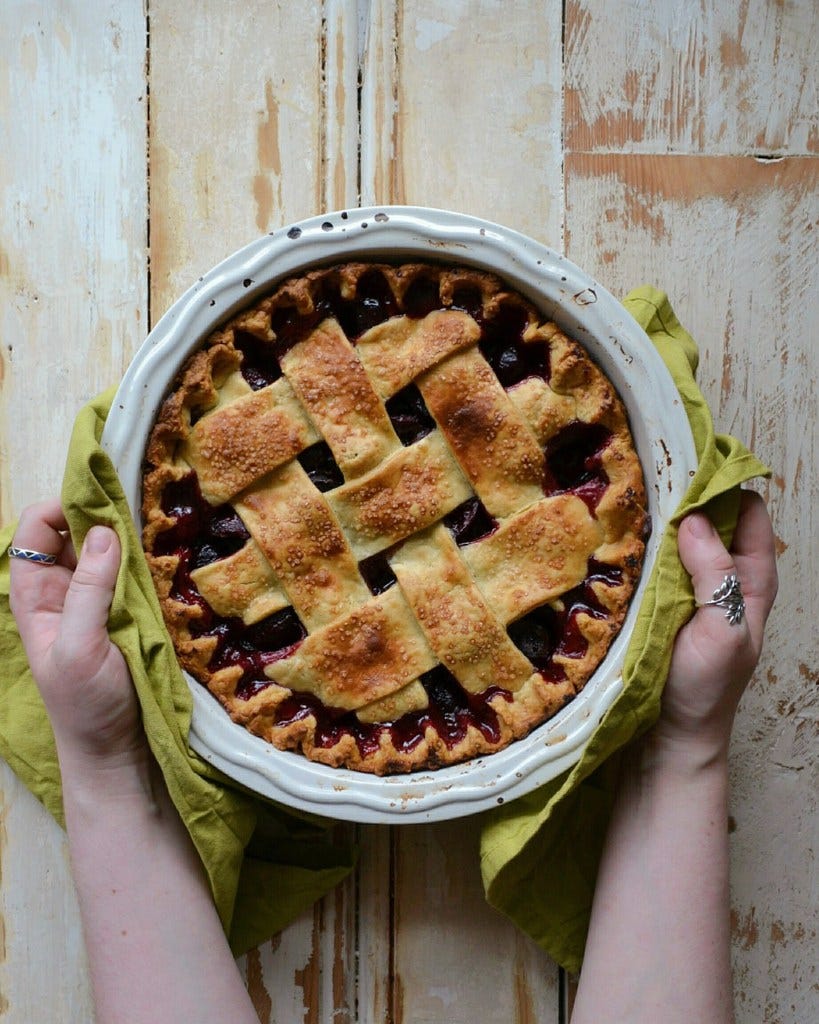
When ready to bake, brush the top of the pie with the beaten egg yolk and sprinkle with some demerara sugar before baking for 40-50 minutes, or until the juices are bubbling & the crust is a deep golden brown.
Leave the pie to cool & serve warm with some lightly whipped cream.
Did you make this recipe? I’d love to know! Please leave a comment & a rating below, or tag me on Instagram @imvcki. Thank you so much for supporting Passionate Baker!
The post Cherry Pie appeared first on Passionate Baker Travels.